How to Take a Walk-In in eZee FrontDesk
Introduction
A walk-in guest is someone who arrives at the hotel without a prior reservation. In eZee FrontDesk, a walk-in can be processed through the following views:
- Room View
- Stay View
- List View
A room can be selected directly from these views. Once a room is chosen, a screen with a few steps will appear.
Alternatively, beginners can use the Walk-In Wizard, which provides a step-by-step guide to complete the check-in process. Experienced users can opt for a quick check-in by selecting a room and proceeding directly.
Steps to Check In a Walk-In Guest
Step 1: Enter Walk-In Information
- Click on the Navigation Button and select Front Office.
- Choose the Walk-In option to open a new window.
- Enter the guest's stay details:
- Room type preference
- Departure date (or ask how many nights they will stay)
- Configure tax settings:
- Taxes can be exempted for diplomats or other eligible guests.
- Click Next to proceed.

Step 2: Select a Room
- Choose by double clicking a room from the list of available rooms.
- By default, both clean and dirty rooms are displayed.
- Use filters to refine the selection:
- Show only clean rooms
- Filter by floor, room type, or specific room
- Click Next
NB: The rooms listed will be based on the number of guests. In the example below the guest are 3 therefore the rooms listed will contain 3 Pax and above.

Step 3: Select the Business Source
- If the booking is through a travel agent or online platform (e.g., Booking.com, Agoda, Expedia), select the business source.
- This helps track revenue reports from different sources.
- Click Next
NB: Please note this option only applies if you have a listed business source. Otherwise click Finish to proceed to the next step.

Step 4: Enter Guest Details
- Fill in the guest’s personal details:
- Name, address, nationality
- Contact details (email, phone number)
- If the guest has stayed before, retrieve their details using the guest profile search.
- Capture the guest’s image via webcam or scan their passport/ID.

- If the guest already exists, click on the
 search button next to the first name to proceed with the selection.

- Check the name of the guest, then OK.

- Click Yes after confirming the details.
- Adding more information of the guest, click on the arrow below the First Name and enter the other details of the guest.

Enter the National ID or Passport Details. On the left of the page enter scan the document by clicking on the Add Image icon at the top. After capturing the document details close the page by clicking on the  icon.
icon.
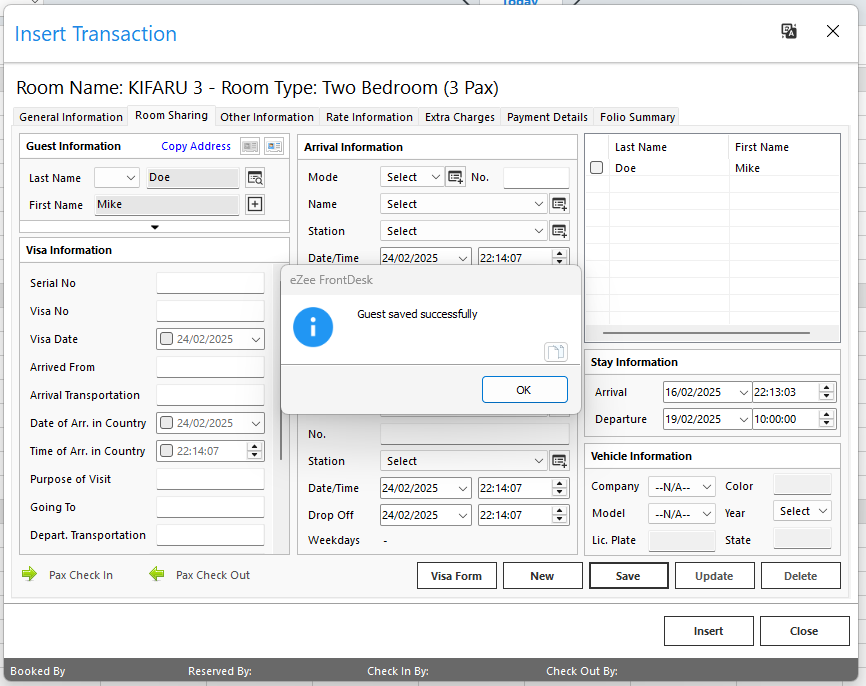
- If there are more than one guest, go to Room Sharing, Click New add the name of the guest and click Save.

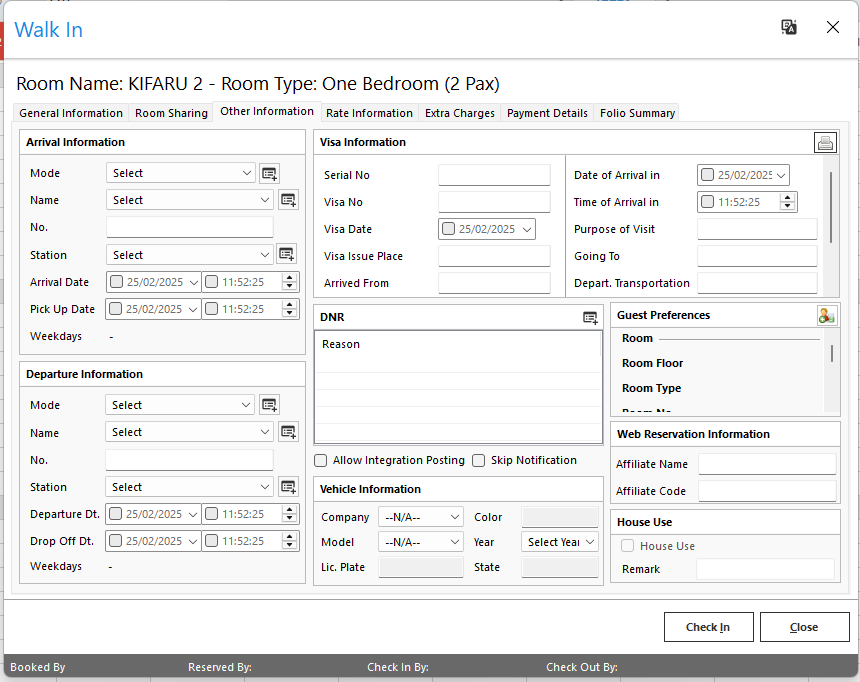
- Add Other Information with the required information as it appears
- Once all the information is captured, click on Check In. It will create a folio with guest information.

- Print the Folio.

The Walk In information will appear as seen in the screen below.

Watch the steps below to see how to enter information of a Walk In Guest.